What Is the Correct Order to Apply Makeup? The Ultimate Step-by-Step Guide
 Jun, 4 2026
Makeup Application Order Quiz
Your Routine Timeline
Available Steps (Click to Select)
Have you ever spent twenty minutes perfecting your base, only for it to slide off your face by noon or look cakey within an hour? It’s frustrating. You bought the right products, but something feels off. Usually, the culprit isn’t the product itself-it’s the order in which you applied them.
Applying makeup is less about artistic flair and more about chemistry and layering logic. If you put heavy cream products under liquid ones, they will pill. If you apply powder before your cream blush, your color disappears. Getting the sequence right ensures longevity, blendability, and a finish that looks like skin, not a mask. Here is the definitive guide to the correct order of makeup application, broken down from prep to set.
The Foundation: Skincare Prep
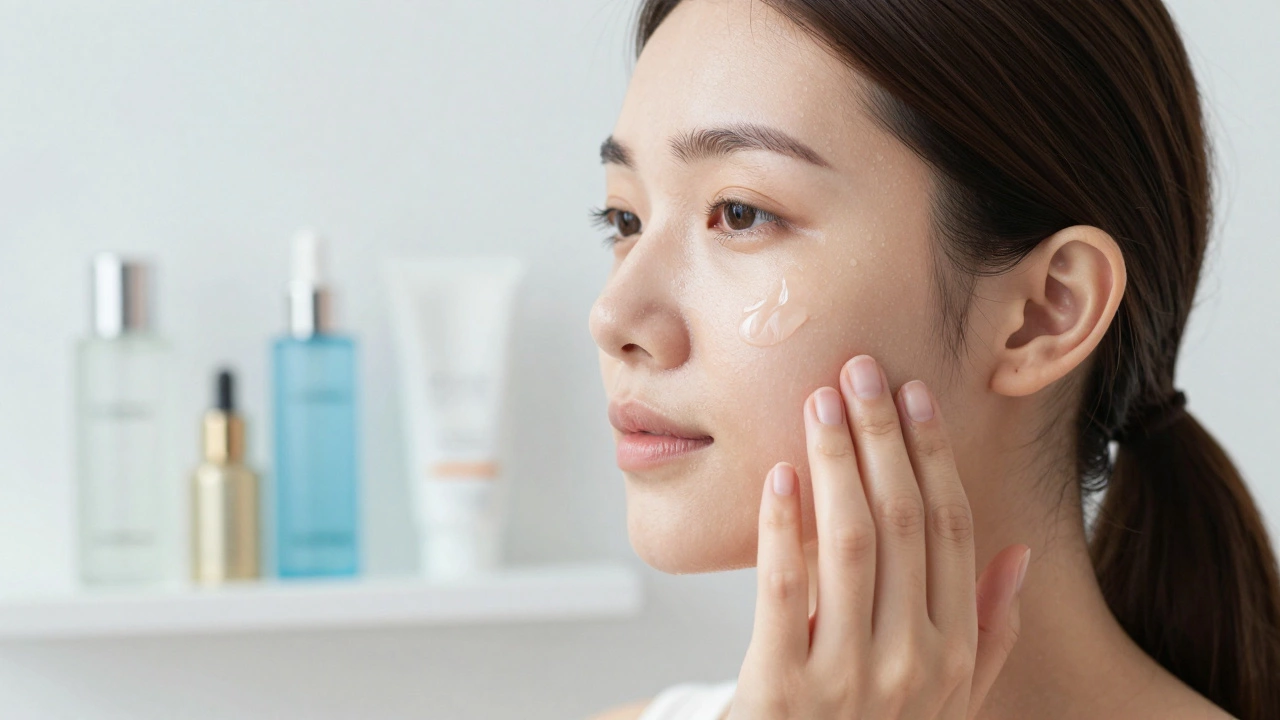
Before any pigment touches your face, your canvas needs to be prepped. This step determines how smooth your makeup sits and how long it lasts. Many people skip this or rush through it, leading to patchy foundation.
- Cleanse: Start with a clean face. Even if you aren’t wearing makeup yet, overnight oil and bacteria can interfere with adhesion.
- Toner/Essence: Use a hydrating toner to balance your pH levels. This helps subsequent layers absorb better rather than sitting on top of dry patches.
- Serums: Apply targeted serums here. Hyaluronic acid is great for hydration, while niacinamide can help control shine. Wait 60 seconds for absorption.
- Eye Cream: The skin around your eyes is thin and prone to creasing. A light eye cream prevents your concealer from settling into fine lines later.
- Moisturizer: Lock everything in. Oily skin types might opt for a gel moisturizer; dry skin types need a richer cream. Let this sink in for at least two minutes. If your moisturizer is still tacky, your primer will slip around.
- Sunscreen: This is non-negotiable. Apply a broad-spectrum SPF 30 or higher. Wait another minute for it to form a film. Applying foundation over wet sunscreen results in pilling.
Pro tip: If you have very dry skin, consider using a facial oil after moisturizer. For oily skin, skip the oil and ensure your sunscreen is matte-finish.
Primer: The Bridge Between Skin and Makeup
Primer is a preparatory cosmetic product designed to create a smooth surface for makeup application and improve its longevity. Also known as Makeup Base, it acts as a barrier between your skincare oils and your makeup pigments.You don’t always need primer, but if you use one, it goes immediately after skincare and before any color cosmetics. Think of it as double-sided tape. One side sticks to your skin, the other holds your foundation.
- Pore-filling primers: Best for the T-zone (nose, forehead, chin). These blur imperfections.
- Hydrating primers: Ideal for cheeks and dry areas. They add dewiness and prevent flaking.
- Color-correcting primers: Green neutralizes redness; peach cancels dark circles; lavender brightens sallow skin.
Apply primer sparingly. Too much can cause sliding. Focus on areas where you tend to wear off fastest or where pores are most visible.
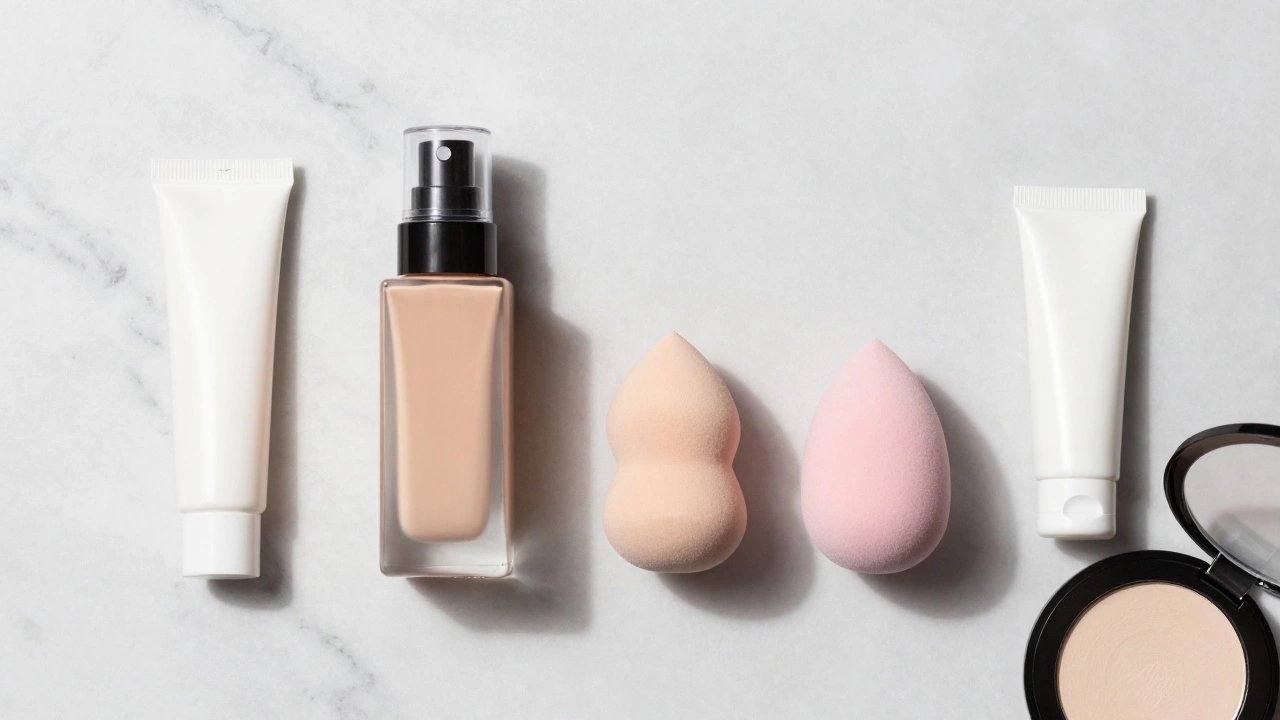
Base Makeup: Foundation and Concealer
This is where many people get confused. Do you apply concealer before or after foundation? The general rule is foundation first, then concealer.
Why? Foundation evens out your overall skin tone. Once that’s done, you’ll see exactly where you still need coverage-usually under the eyes, around the nose, or on blemishes. If you apply concealer first, you might wipe it away when blending your foundation, wasting product and time.
- Foundation: Apply a small amount to the center of your face and blend outward. Use a damp beauty sponge for a natural finish or a brush for more coverage. Less is more; you can always build it up.
- Concealer: Apply concealer only where needed. For under-eye circles, place it in an inverted triangle shape to lift the face. For blemishes, dot it directly on the spot and pat the edges, leaving the center thick to avoid moving the product.
If you’re using a color corrector (like green for redness), apply that before foundation. Neutralizing colors work best when covered by a sheer layer of foundation.
Brows and Eyes: The Frame of Your Face
After your base is set, move to the upper half of your face. Doing brows and eyes before contouring allows you to adjust your base if any fallout occurs.
- Brow Pencil/Powder: Fill in sparse areas with light, hair-like strokes. Set with clear or tinted brow gel. Defined brows frame the face and prevent a washed-out look.
- Eyeshadow Primer: Essential for preventing creasing. Apply a thin layer to the lid.
- Eyeshadow: Start with a transition shade in the crease, then build depth. Apply shadow before eyeliner so you can blend without disturbing your liner.
- Eyeliner: Tightline (apply to the waterline) for definition or wing out for drama. Gel or pencil liners are easier to smudge and blend than liquids.
- Mascara: Curl lashes first, then apply mascara. Two coats max to avoid clumping.
If you’re doing false lashes, apply them after eyeshadow and eyeliner but before mascara (or after, depending on preference). Always seal with a coat of mascara to blend real and fake lashes.
Face Dimension: Bronzer, Blush, and Highlighter
Now that your canvas is even and your eyes/brows are done, it’s time to bring back dimension. Powder products go over cream/liquid bases. If you prefer cream blushes, apply them before setting powder (see next section).
- Bronzer: Apply where the sun hits-forehead, cheekbones, jawline. This warms up the complexion and adds subtle contour.
- Blush: Smile and apply to the apples of your cheeks, blending upward toward the temples. Pink suits cool tones; peach/coral suits warm tones.
- Highlighter: Dab on the high points: cheekbones, bridge of the nose, cupid’s bow, and inner corners of the eyes. Keep it subtle for a natural glow.
Remember: Cream products melt into the skin; powders sit on top. If you mix textures, always go cream-to-powder.
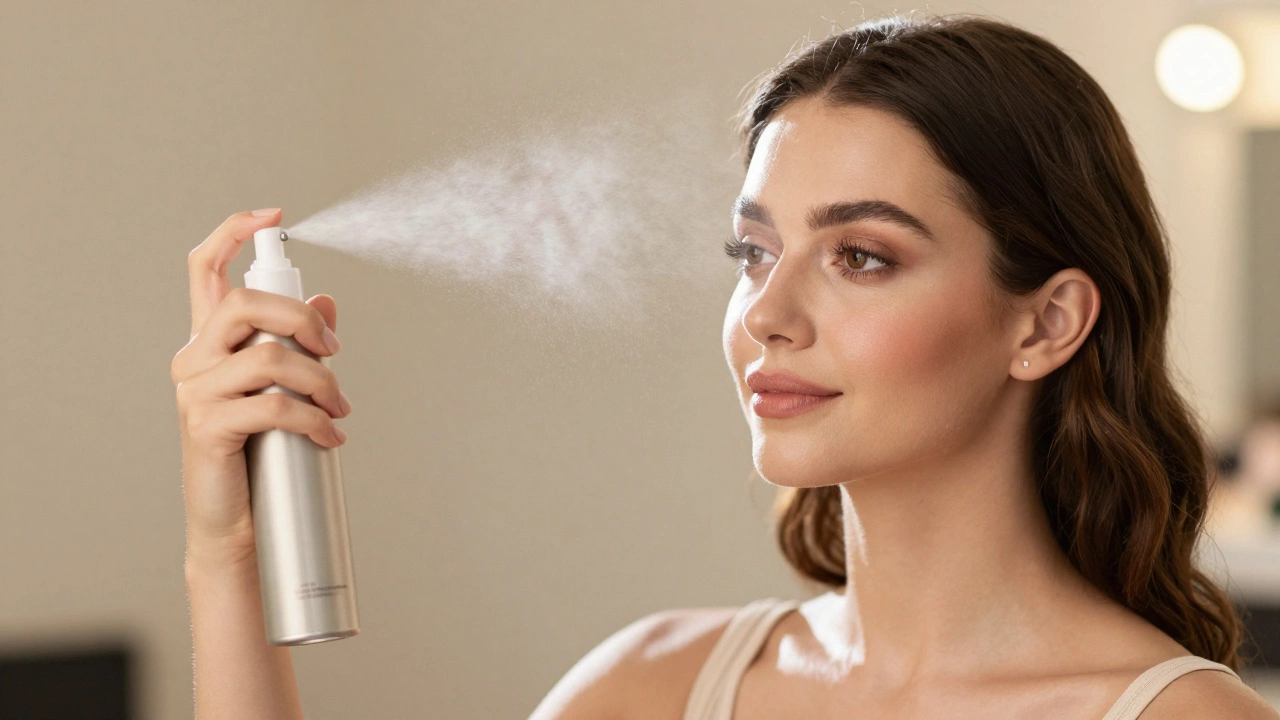
Setting: Locking It All In
This step is crucial for longevity. Without setting, your makeup will migrate throughout the day.
- Setting Powder: Use a translucent powder to "bake" or lightly dust over areas that get oily (T-zone, under eyes). This absorbs excess oil and sets liquid/cream products. Don’t overdo it, or you’ll look flat.
- Contour (Powder): If you didn’t do cream contour earlier, now is the time. Apply below cheekbones, along hairline, and jawline for structure.
- Setting Spray: The final seal. Hold the bottle 8-10 inches from your face and mist in an X and T motion. This melts powders together and reduces the "powdery" look, giving a skin-like finish.
For extra hold, try the "sandwich method": Setting spray → Powder → Setting spray.
Lips: The Final Touch
Lipstick or lip gloss goes last. Why? Because if you spill coffee or eat a snack, you can reapply lipstick without ruining your entire face. Also, some lip formulas contain oils that can break down nearby foundation if applied too early.
- Lip Liner: Outline and fill in lips to prevent feathering and increase longevity.
- Lipstick/Gloss: Apply your chosen formula. Blot with tissue for a matte finish or leave glossy for shine.
| Step | Product Type | Key Purpose |
|---|---|---|
| 1 | Skincare & SPF | Prep and protect |
| 2 | Primer | Smooth and adhere |
| 3 | Color Corrector (if used) | Neutralize discoloration |
| 4 | Foundation | Even skin tone |
| 5 | Concealer | Targeted coverage |
| 6 | Brows & Eyes | Frame the face |
| 7 | Bronzer/Blush/Highlight | Add dimension |
| 8 | Setting Powder & Contour | Matte and define |
| 9 | Setting Spray | Lock in place |
| 10 | Lips | Final polish |
Common Mistakes to Avoid
Even with the right order, small errors can ruin the effect. Watch out for these:
- Rushing skincare: Not letting moisturizer or sunscreen absorb leads to pilling foundation.
- Too much product: Layering thick layers of primer, foundation, and concealer creates a mask-like texture. Thin layers build better.
- Skipping setting: Skipping powder or spray means your makeup won’t survive humidity or touch.
- Wrong tools: Using dirty brushes introduces bacteria and affects blendability. Clean tools regularly.
Should I apply concealer before or after foundation?
Apply concealer after foundation. Foundation evens out your overall skin tone, allowing you to see exactly where you need extra coverage. Applying concealer first often results in wiping it away during foundation blending, wasting product and reducing coverage.
Do I need primer if my foundation has good staying power?
Not necessarily. Primer is optional but beneficial for specific concerns. If you have large pores, use a pore-filling primer. If your skin is dry, a hydrating primer helps. If your foundation already performs well and you have no specific issues, you can skip primer and go straight from skincare to foundation.
When should I apply bronzer vs. contour?
Bronzer adds warmth and mimics a sun-kissed glow; apply it where the sun naturally hits (cheekbones, forehead, nose). Contour creates shadows and definition; apply it where shadows naturally fall (under cheekbones, jawline, sides of nose). Both typically go after foundation and concealer, and before setting powder if using cream formulas, or after setting powder if using powder formulas.
Can I apply cream blush before powder blush?
Yes, and it’s actually recommended. Cream products should always go before powder products. Apply cream blush to your cheeks, then set with a light dusting of translucent powder. You can layer a powder blush on top for added intensity and longevity. This technique blends seamlessly and avoids the powdery look.
How long should I wait between skincare and makeup?
Wait at least 1-2 minutes after applying moisturizer and sunscreen before starting makeup. This allows the products to absorb and form a stable base. If your skin feels tacky or sticky, wait longer. Applying makeup over wet skincare causes pilling and uneven application.
Is setting spray necessary if I use setting powder?
Setting powder and setting spray serve different purposes. Powder mattifies and sets liquid/cream products by absorbing oil. Spray locks everything in place and melds layers together for a more natural finish. For best results, use both: powder first to set, then spray to seal. However, if you must choose one, spray is better for longevity, while powder is better for controlling shine.
What if I have oily skin? Does the order change?
The order remains the same, but product choices change. Use oil-free moisturizer and mattifying primer. Opt for long-wear, matte foundation. Apply setting powder generously on the T-zone. Consider using blotting papers throughout the day instead of adding more powder, which can look cakey. The sequence stays: Skincare → Primer → Foundation → Concealer → Powder → Spray.
Should eyebrows be done before or after foundation?
Eyebrows can be done either way, but many professionals prefer doing them after foundation. This allows you to see your true skin tone and ensure your brow color complements your base. However, if you’re worried about fallout from eyeshadow affecting your base, do brows and eyes before foundation. Both approaches work; choose based on your comfort level.